Monday, August 6, 2012

Bacon in that recipe? I'm on it!

Any recipe that starts with frying up bacon has me interested. I'll try any recipe once.
I don't remember where I came across the recipe for Bacon, Gruyere and Green Onion Scones, probably on Pinterest. I find a lot of recipe ideas there.  This one seemed fairly simple.  And I'm in the mood to cook! Of course I made more bacon than what the recipe called for, mostly because I would have ended up with 3 random pieces of bacon, and they made for good snacking while I worked in the kitchen.


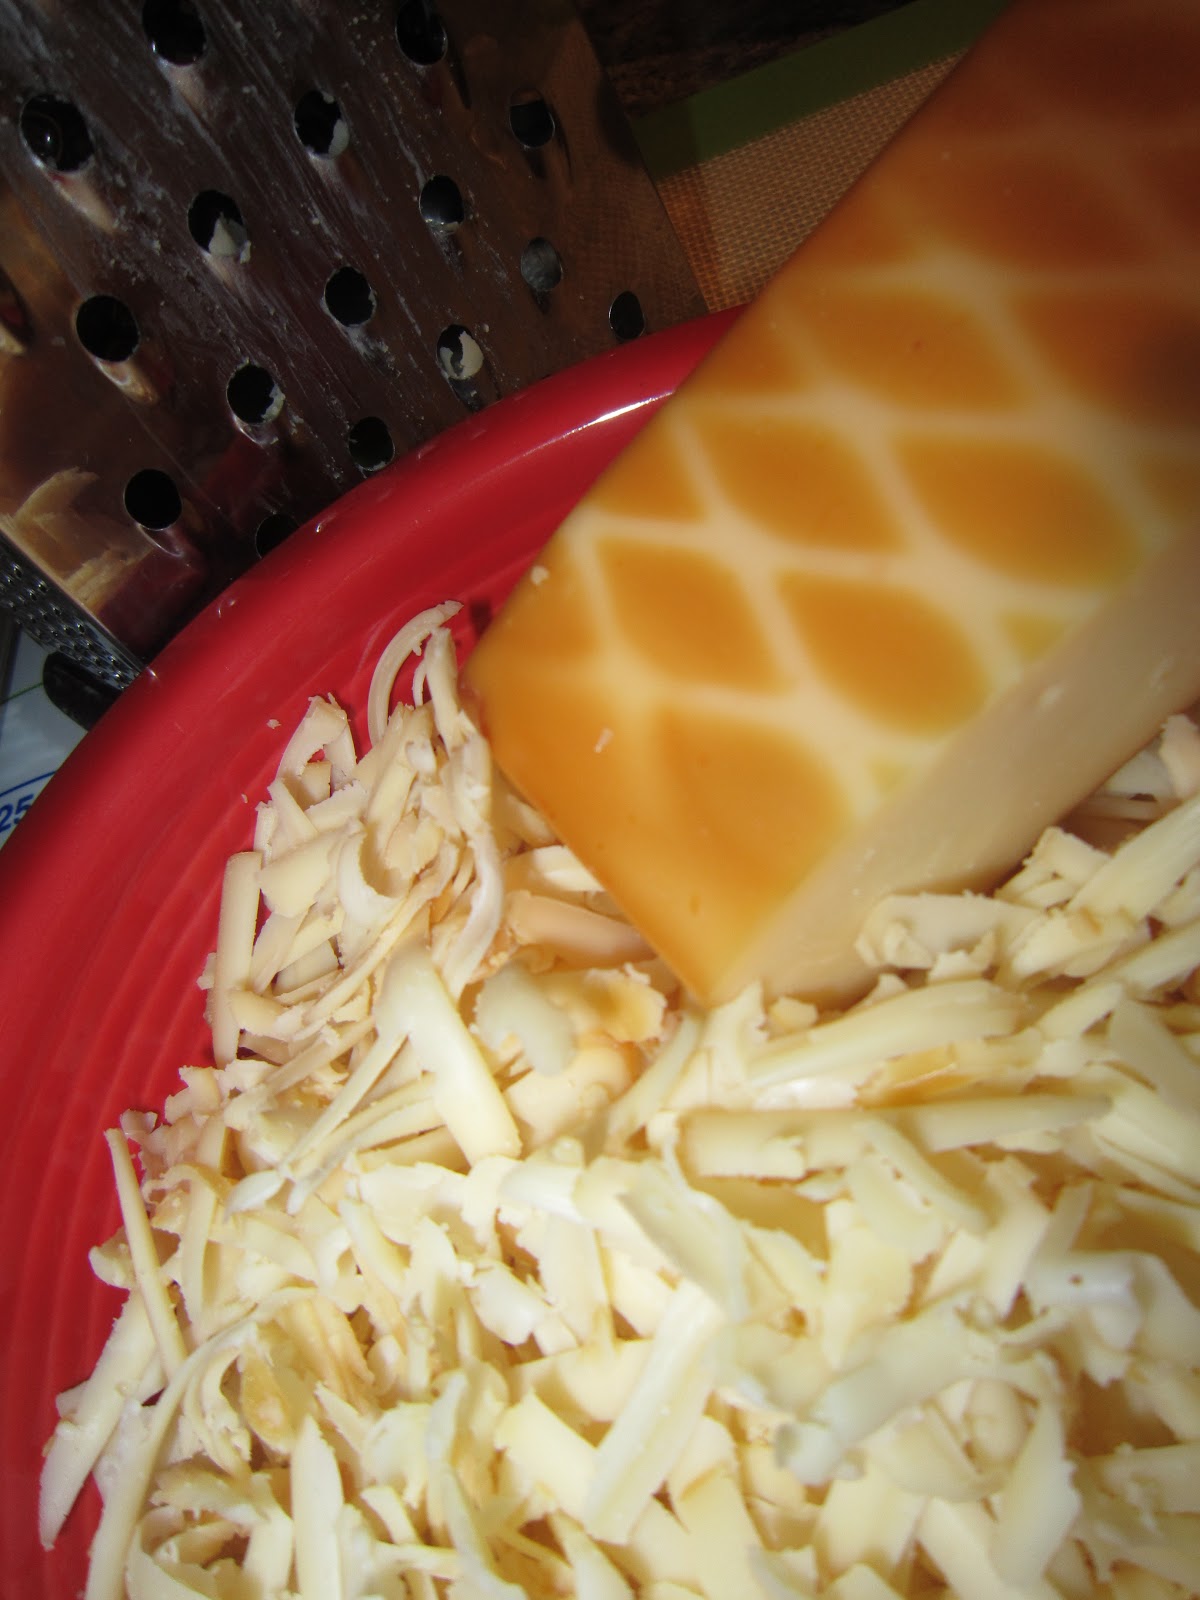
After getting out the ingredients I would need for this recipe I started grating the cheese and chopping the green onions and put them in bowls for later.


Mix up or sift the dry ingredients together then it's time to cut in the butter. This is best done by hand, I tried to use the mixer, no go...

Once the butter has been cut in, toss the bacon, cheese, green onions and pepper in

Mix it well

Add the buttermilk.

Mix it till it forms a dough and shape it into a round and refrigerate for 30 minutes or so.

My oven doesn't take long to preheat, so I didn't turn it on until the 30 minutes were up.

Roll the dough out to about 1/2 inch thick (this was a pain as the dough wanted to stick to the rolling pin...but I managed...) and you can cut it into rounds, or as I decided to do triangles, I don't know why but when I think scones I think triangles...


I don't use parchment paper, I put my scones on my silpat mats...and then brushed them with the heavy cream.  Good thing I made ice cream the other night...I have leftover heavy cream for this!

Into the oven they go for 20-25 minutes watching for that perfect golden brown.

Once they are done you can serve them warm with some honey butter, or whatever you want.  If you make them in advance just warm them up for a few seconds in the microwave.

Warm, flaky, a bit spicy...and totally yummy!  Enjoy!

Every day is a good Pizza Day

Freezer meals are all the rage right now.  So I have my own recipe to contribute! Pizza Casserole!


You will need:
Mostaccioli Pasta, or whatever you want to use
1 jar of your favorite pasta sauce
Diced Pepperoni
8oz shredded Italian cheese
8 oz fresh mushrooms sliced (or slice whole mushrooms)
Can sliced olives
1/2 sweet onion
2 bell peppers
2-3 strips of bacon chopped (yes really)
Glad Ovenwear (or something like it)

Chop up the onion and mushrooms, these go in a bowl together off to the side


Then chop up the peppers and put them in a separate bowl
Chop up the bacon and throw it in a skillet over medium-high heat
In the meantime get some water boiling and get the pasta cooking!!

Once the bacon is crisp move it to a bowl (leaving the renderings in the pan) and set aside for later.Toss the Onions and mushrooms in the skillet and stir them up a bit, reduce heat to Medium. Add Italian Seasoning.

Cover with a lid and let it simmer for 5 minutes then add the peppers.

Once the pasta is done, rinse well with cold water, also rinse the pot with cold water because you will be mixing everything up in it.

Mix the "toppings" with the pasta

Add the sauce and stir well.


Throw in most of the bag of cheese, reserving some to top the casserole and then mix it up!

Divide the casserole between two Glad Ovenwear dishes, top with remaining cheese.

Freeze until you are ready to eat!  Then thaw and put it in the oven at 350 until bubbly.  Or you can always microwave it until bubbly.  Enjoy!

Sunday, August 5, 2012

It's an all day thing

Pork was on sale yesterday, so I got a nice big roast, and  I remembered making a delicious BBQ roast years ago so I dug out the recipe.  Low and Slow BBQ Pork Roast is a delicious alternative to a crock pot meal, although it does use the oven...today I don't care.

Preheat the oven to 250

Gather the spices and the roast

Get the rub measured out, and the mixed together, set it aside and deal with the meat


I rinsed my pork roast and patted it dry before putting it on foil and covering it with the rub

Wrap it tightly with foil, adding as much as needed to make it tight and "leak proof" you want the juices to stay inside.

This next step takes hours, so set a timer for 4 or 5 hours and walk away to do something else...

Once the timer has gone off, you are ready for the next step towards dinner! Remove the roast from the oven and make a slit in the top so you can drain the liquid.

Bump up the temperature to 350.


Get out your favorite BBQ sauce

And spread it on top of the roast!

Put it back in the oven and continue cooking for another hour and a half, checking to make sure the top isn't getting too dark (if this happens, put foil over the opening.)

Let it rest a bit while you are pulling the rest of dinner together!  We are having scalloped potatoes and green beans with ours!

Enjoy!

Saturday, August 4, 2012

"Ice cream is happiness condensed"

Jessi Lane Adams had it right with that quote.  There is nothing like Ice Cream on a hot day.  My DH and I were fortunate enough to receive a ice cream maker at our wedding shower.  And now I'm going to put it to use and actually make some!  It was his idea, he asked about it on our way to the grocery store today so I looked up a basic recipe for ice cream, and added the ingredients to my list.  So tonight I am going to make Caramel Macchiato Ice Cream, which also happens to be one of my favorite beverages!  It is definitely an ice cream for coffee lovers!


This recipe is nice and simple, no tempering or heating so you can get to freezing it sooner!  As always, gather all your ingredients...


Whisk the milk, coffee, sugar and salt together till the sugar is dissolved,  then add the heavy cream and stir.  Cover and put in the fridge for 2 hours...simple!


Once the 2 hours is up time to put the mixture in the ice cream machine.  Just follow the directions for your maker and let'er rip!


While the ice cream is freezing it is time to make the caramel sauce...I'm microwaving it because it is waaayyy to hot to fire up the oven...which is the other reason the ice cream recipe works so well...no heating!


Pay close attention to the size of the bowl, timing and stirring directions, you don't want burnt caramel. And using too small of a bowl will result in the caramel boiling over...I speak from experience. Now I must caution that this process takes a lot of muscle, and patience, lots and lots of patience.
Done "cooking" time to whip

Ohhhh, that doesn't look good...

Ah wait, there it is...nice and smooth

Aaaaannnnd...because it started to seize up, I added splashes of the leftover heavy whipping cream to it until the consistency was back where it needed to be!

After the caramel is done, and the ice cream is done (waaaaayyyy longer than 20 minutes) layer and swirl the caramel into the ice cream and put in the freezer for at least 2 hours, overnight is better!
Don't forget to lick the caramel bowl!  Enjoy!

Thursday, July 26, 2012

It's a bacon kind of day

I had a dream last night about popcorn, I tried to get some at a concert and they wouldn't let me have any.  I woke up this morning craving popcorn.    The triple digit heat finally broke today, so I think I'm going to make some.  A new recipe, I found it on another food blog, but I wanted to tweek it, for better flavors!  I'm ready to get in the kitchen and start making some magic!  Bring on the Spicy Caramel BACON Popcorn!


In the original blog post the blogger noted that this tends to be a quick recipe, and taking pictures needs to be done carefully...so at her suggestion, and keeping with my tradition, I got all my ingredients out and ready to go!
Once everything was in place the first order of business is to get the bacon cooking. 
The original recipe has you do the bacon in the oven, but I wanted to use the bacon renderings to pop the popcorn, and to add that little bit of extra bacon flavor.  Cook the bacon over Medium heat.  Once the bacon is nice and brown, let it drain on a plate with paper towels, then chop it up into little bits.


Turn the heat up on the drippings to Medium-High
Add one or two kernels, and wait for them to pop
Add the remaining kernels, 
Pop the lid on, and shake it constantly until almost all the popcorn has popped.  
You can tell because you won't hear much popping.  Takes 2-4 minutes.  Pull it off the heat and let it finish popping.
Mix up the baking soda and cayanne...next time I'm going to add a bit less (original recipe called for 3/4 teaspoon...but I'm a sissy and only added 1/2 teaspoon, and that was almost too much.)
Then in a large saucepan throw in the butter, sugar, and water along with the salt.  I used The Spice Agent's Vanilla Bean Salt...because I can, and because it makes it that much better.
Put it on the stove on high heat, and let it do it's thing...seriously, put the spoon down and let it just boil and brown on it's on...
While that is browning (takes about 8-10 minutes) I put my huge silpat baking mat on the counter, non stick, and easier to clean up than a baking sheet that has been sprayed with non stick spray...

Once it's nice and brown dump in the baking soda mix, followed by the bacon.  The dump it all over the popcorn.  Use a spatula to stir the mix as best you can and spread it out on the baking mat.
Let it cool, otherwise you will end up with chewy bits of the caramel stuck in your teeth...I am speaking from experience.  After it's cool break it up into smaller chunks and share with friends. Regardless, make sure it's in an airtight container and keep it in the refrigerator for up to 4 days.

Saturday, July 21, 2012

Oh the things to come!

My neighbor bought a dehydrator so we could make chicken treats for our dogs (it's being shipped and will be here next week hopefully).  They love them and store bought ones can be dangerous, and of course expensive!  Making dog jerky is simple; slice and dry.  They don't need the extra flavorings, nor should they really have the extra seasoning...

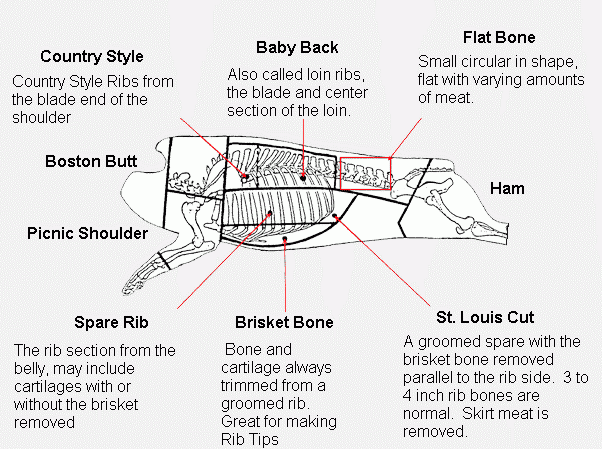
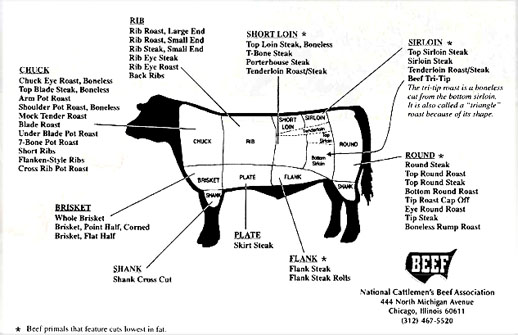
All this talk about making jerky for the dogs gets me craving it for myself.  Doesn't help that my DH has been getting some at work and talking about it.  I'm sure he would share it, except it is apparently very spicy, which is why he gets it by default.  I started researching jerky making, there is a LOT of information out there!  So far I have found the best cuts of meat for pork and beef for making jerky

Pork:
Tenderloin
Loin
Fresh Ham
Butt
Sirloin
Cushion meat


Beef:
Top Butt Sirloin
Flap Meat
Flat Iron/Top Blade
Top Round
Flank Steak
Rump Roast

Approximately 4 pounds of meat will yield 1 pound of jerky.  There are also various marinade mixes you can go out and purchase to make jerky at home, but what fun is that?  I did find several variations of jerky marinade that I do want to try, although my end goal is to create my own mixture of flavors for some awesome jerky that I can truly call my own. 


So, stay tuned for some meaty goodness.  I plan on tackling beef, and pork jerky (bacon style) and maybe some other proteins.  And of course other delicious snacks made possible with a dehydrator!