Thursday, July 26, 2012

It's a bacon kind of day

I had a dream last night about popcorn, I tried to get some at a concert and they wouldn't let me have any.  I woke up this morning craving popcorn.    The triple digit heat finally broke today, so I think I'm going to make some.  A new recipe, I found it on another food blog, but I wanted to tweek it, for better flavors!  I'm ready to get in the kitchen and start making some magic!  Bring on the Spicy Caramel BACON Popcorn!


In the original blog post the blogger noted that this tends to be a quick recipe, and taking pictures needs to be done carefully...so at her suggestion, and keeping with my tradition, I got all my ingredients out and ready to go!
Once everything was in place the first order of business is to get the bacon cooking. 
The original recipe has you do the bacon in the oven, but I wanted to use the bacon renderings to pop the popcorn, and to add that little bit of extra bacon flavor.  Cook the bacon over Medium heat.  Once the bacon is nice and brown, let it drain on a plate with paper towels, then chop it up into little bits.


Turn the heat up on the drippings to Medium-High
Add one or two kernels, and wait for them to pop
Add the remaining kernels, 
Pop the lid on, and shake it constantly until almost all the popcorn has popped.  
You can tell because you won't hear much popping.  Takes 2-4 minutes.  Pull it off the heat and let it finish popping.
Mix up the baking soda and cayanne...next time I'm going to add a bit less (original recipe called for 3/4 teaspoon...but I'm a sissy and only added 1/2 teaspoon, and that was almost too much.)
Then in a large saucepan throw in the butter, sugar, and water along with the salt.  I used The Spice Agent's Vanilla Bean Salt...because I can, and because it makes it that much better.
Put it on the stove on high heat, and let it do it's thing...seriously, put the spoon down and let it just boil and brown on it's on...
While that is browning (takes about 8-10 minutes) I put my huge silpat baking mat on the counter, non stick, and easier to clean up than a baking sheet that has been sprayed with non stick spray...

Once it's nice and brown dump in the baking soda mix, followed by the bacon.  The dump it all over the popcorn.  Use a spatula to stir the mix as best you can and spread it out on the baking mat.
Let it cool, otherwise you will end up with chewy bits of the caramel stuck in your teeth...I am speaking from experience.  After it's cool break it up into smaller chunks and share with friends. Regardless, make sure it's in an airtight container and keep it in the refrigerator for up to 4 days.

Saturday, July 21, 2012

Oh the things to come!

My neighbor bought a dehydrator so we could make chicken treats for our dogs (it's being shipped and will be here next week hopefully).  They love them and store bought ones can be dangerous, and of course expensive!  Making dog jerky is simple; slice and dry.  They don't need the extra flavorings, nor should they really have the extra seasoning...

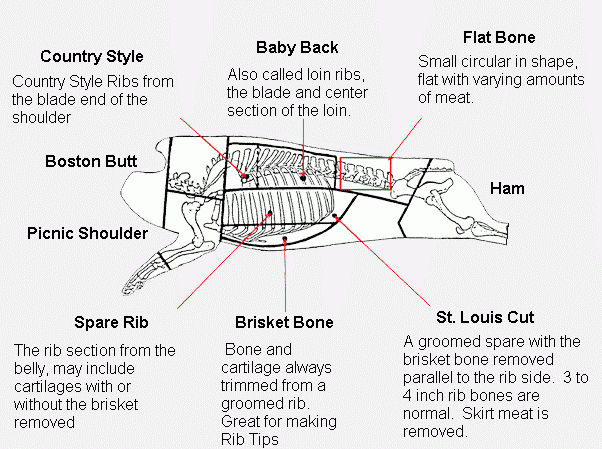
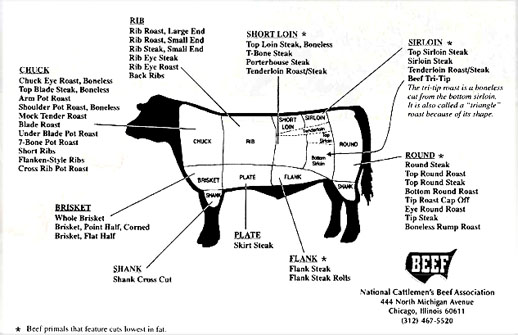
All this talk about making jerky for the dogs gets me craving it for myself.  Doesn't help that my DH has been getting some at work and talking about it.  I'm sure he would share it, except it is apparently very spicy, which is why he gets it by default.  I started researching jerky making, there is a LOT of information out there!  So far I have found the best cuts of meat for pork and beef for making jerky

Pork:
Tenderloin
Loin
Fresh Ham
Butt
Sirloin
Cushion meat


Beef:
Top Butt Sirloin
Flap Meat
Flat Iron/Top Blade
Top Round
Flank Steak
Rump Roast

Approximately 4 pounds of meat will yield 1 pound of jerky.  There are also various marinade mixes you can go out and purchase to make jerky at home, but what fun is that?  I did find several variations of jerky marinade that I do want to try, although my end goal is to create my own mixture of flavors for some awesome jerky that I can truly call my own. 


So, stay tuned for some meaty goodness.  I plan on tackling beef, and pork jerky (bacon style) and maybe some other proteins.  And of course other delicious snacks made possible with a dehydrator!

Friday, July 20, 2012

I want a midnight snack!

It's just after midnight here, and I'm craving something crunchy, maybe a bit salty...so I raided the fridge...not much there...

BUT...I did find 3 beautiful cucumbers and a half an onion...so it's time for Cucumber and Onion Salad.  This can be made once, and as long as you keep adding cucumbers and onion you can keep this salad going all summer long!  So I'm going to make some for snacking on tomorrow!

Gather your cucumbers and onion, I'll be adding more onion tomorrow but for now I only have a half of one.

I am a lucky owner (thanks mom and dad) of a mandolin.  Makes slicing stuff SOOOOOOO much easier.  And safer for my fingers too!

Once it's all sliced, cucumbers and onion plop them in your container (with lid).

In a large measuring cup add 1 cup white vinegar, 2 cups water, and 1/2 cup sugar stir it up!
                                                                                                          
Sprinkle 1 tablespoon pepper and a dash of salt over your cucumber and onions then pour the liquid on top!

Pop that lid on, and carefully turn it to mix it all up. You might want to do this over the sink as my container wasn't totally leak proof.


I also made a second more spicy batch for my DH using Turmeric and Crushed Red Pepper.  There was enough liquid left after I filled the first container to fill the second smaller container.


Refrigerate overnight and ENJOY!  Keep adding Cucumber and Onion as the "supply" gets eaten!

Thursday, July 19, 2012

Multipurpose

I've been working on a new project.  I have the opportunity to do a pro bono project, turning an old church, into a useful multipurpose building for youth group, a contemporary service, and a coffee and snack area.  The church has owned this building for a number of years, and it is currently largely unused.

The decor needed to be geared towards young adults, in the 20-30 year range.  The color pallet I chose is elegant and modern.

I gave the church two options for the coffee and snack area.

The first option kept the small two piece bath that is currently there.  Flipping the sink from the main room into the office and adding cabinets on the back wall for more storage.  Opening up the window, and adding a small 10" counter for setting coffee pots and other items on.


The second option would be a bit more expensive as it would mean taking down the walls to the bathroom, capping the toilet and using the plumbing for the sink for the plumbing for the new kitchen sink.  The cabinetry would extend on two sides of the room giving more storage space and more prep space.


The main space would be visually divided by the furniture in the room.  The church requested pub height tables and chairs.

At the opposite end of the space is the baptismal.  It is currently blocked off and not working, but the plans are to fix it, and revamp it so it can be part of the decor.  My plans are to remove the current orange painted paneling and to drywall the entire wall, painting it off white so it can be used with projectors.  The paneling in the baptismal area is to be replaced with faux barn wood. And finished with a Styrofoam cross created by the youth group.
The current ceiling fans need to be replaced, and new carpeting throughout!  I am excited to hear back from the presenter to hear which option the church chooses, and to hopefully be involved in the remodel process!

Tuesday, July 17, 2012

I scream, you scream, but this is dog ice cream!

As hot as it's been it is only fair that my 4-legged children get some cool treats too.  They love the pop-ice, but those really have no nutritional value.


My youngest also loves a simple block of ice to lick on when it's hot.  

Years ago I was introduced to "Frosty Paws" dog ice cream.  But at $5 for 8 small cups...it's just a bit expensive.  So I went researching, and found a homemade alternative, found on doggy loot


The basic recipe:
32 oz. plain yogurt1 mashed ripe banana2 tablespoons peanut butter2 tablespoons honey
Mix all of the ingredients in a blender and put in ice cube trays to freeze. Microwave for a few seconds before serving.
I don't have the banana, or rather I do, but the two bananas I have will be used tomorrow in a future post on banana bread. So my ingredient list looks like this

Yogurt, peaches (will be peeled and pitted of course), peanut butter and molasses.

Instead of ice cube trays, I have some 2oz mini cups with lids perfect for smaller pooches!!

Fill those up, pop the lids on, and put them in the freezer!

The pups really enjoyed "helping" me taste and clean the drops up!  And I'm sure you noted that the ingredients, are all human food.  So you can also make these for kids, just change up the flavor combinations.  If you don't have bananas, you can also use a jar of baby food.  So you can in fact make "meat" ice cream for you pooch!

Wednesday, July 11, 2012

Pasta, chicken and sauce! Oh MY!

There is always more than one way to make a dish.  If you have the time you can create some faboo sauces from scratch, or you can buy some pre-made sauces.  Tonight I'm making cheesy garlic chicken pasta.  And I have a great recipe for the sauce.  Or you can do as I'm doing, and just get Ragu's Cheesy Roasted Garlic Parmesan sauce.

Decide on what type of pasta you want to make with this, and get your pot of water boiling and your pasta cooking!

Get out thawed chicken, mushrooms, and cherry tomatoes.  Slice the chicken into strips.  And then slice your mushrooms unless they came pre-sliced. 


And of course, use separate cutting boards and knives, and wash your hands with hot water and soap after you touch the chicken! 

Toss these together in a nice pan with some hot olive oil.

Make sure the chicken is totally cooked!  Then remove the chicken and mushrooms from the pan, and set aside.  At this point is when you would make the sauce from scratch if you wanted.  OR you can just dump the sauce into the pan and heat over medium until it is heated through!

Now you can take the cherry tomatoes and quarter them.

Put the chicken and mushrooms into the sauce, and make sure everything is thoroughly heated and mixed.  Serve over the noodles!

Enjoy!


Tuesday, July 3, 2012

When in doubt, add bacon!

The 4th of July means it's time for friends, family and fireworks.  And of course this means get-togethers and lots of food!  Tomorrow I am taking Red Potato Salad to once such event.  So today, I am making said potato salad so the flavors can rest and meld overnight.  Yes this is important...

You need about two pounds of red potatoes, and then you need to boil them....which gets the kitchen nice and hot and steamy...but it needs to be done.

After they are tender but not falling apart drain them and stick them in the fridge to cool COMPLETELY...it's easier handling a cold potato rather than burning your fingers on a hot one, and they tend to be easier to cut.

While the potatoes are cooling it's time to brown up some bacon (like you are surprised that I'm using bacon)

and boil the eggs                                           takes 20 minutes


Once the eggs are done, and peeled, put them in the fridge too, on top of the potatoes is just fine...less dishes

As soon as everything is cool, cube the potatoes, slice the eggs (I have a handy multi-slicer for my eggs) and chop up the bacon, green onion and celery.  Throw this all back into the original chilling bowl...less dishes this way.

In a separate bowl, mix up the mayo, sour cream and pepper.  If you are feeling a bit frisky, like I am, you can also add a few tablespoons of the bacon drippings to the mix for that extra bacony taste!

Combine the dressing with the potatoes eggs and bacon...stir to mix then cover and refrigerate until ready to serve!  Just remember this has eggs and mayo, so don't leave it out in the hot sun all day!