Thursday, July 17, 2014

More rhubarb yumminess!

After making my pie last week I ended up with some extra rhubarb.  Not quite enough to make jam, but almost.  My mom ended up getting some rhubarb from the grocery store so we had enough to make jam.


Before I go into making jam, lets delve into what rhubarb is exactly.  Is it a fruit? a vegetable? According to the internet "Rhubarb is usually considered a vegetable. In the United States, however, a New York court decided in 1947 that since it was used in the United States as a fruit, it counted as a fruit for the purposes of regulations and duties. A side effect was a reduction on imported rhubarb tariffs, as tariffs were higher for vegetables than fruits." According to almanac.com, "Rhubarb is a perennial vegetable, though it is generally used as a fruit in desserts and jams. You only eat the stalks, which have a rich tart flavor. The leaves of this plant are poisonous, so be sure that they are not ingested. Rhubarb is easy to grow, but needs cool weather to thrive."  It is usually stewed with sugar or used in pies and desserts.  There are also recipes that use it to make savory dishes or you can even pickle it!

I have already made the pie, which is already completely gone, and now it's time to jam!

The recipe I used is from Kraft.  I thought it would really focus on the flavor of the rhubarb, because that is the only flavor in the recipe!  So here is my adventure making Rhubarb Jam!

Step 1: Wash the jars, a few more than you think you will need....just to be safe.
Step 2:  Place the washed jars in a large pot and bring to a boil to sterilize them...this is also super important!
There is a measuring cup in there too, it is used to ladle the hot jam out to pour into the jars.
Step 3:  Get the hot jars out of the boiling water and put them to the side.  Don't burn yourself!  You will notice in many of the pictures that I am wearing rubber gloves, that is to protect my hands from burns from the steam, water, and hot jam!


Step 4:  Weigh and rough cut the rhubarb.  The recipe calls for about 2.5 lbs of rhubarb, or 4-1/2 cups prepared, so you have to cook it down before you measure it...so we threw the rough cut pieces into a food processor...made it easier

Step 5: Put the rhubarb and 1 cup of water in a pan and cook it down.

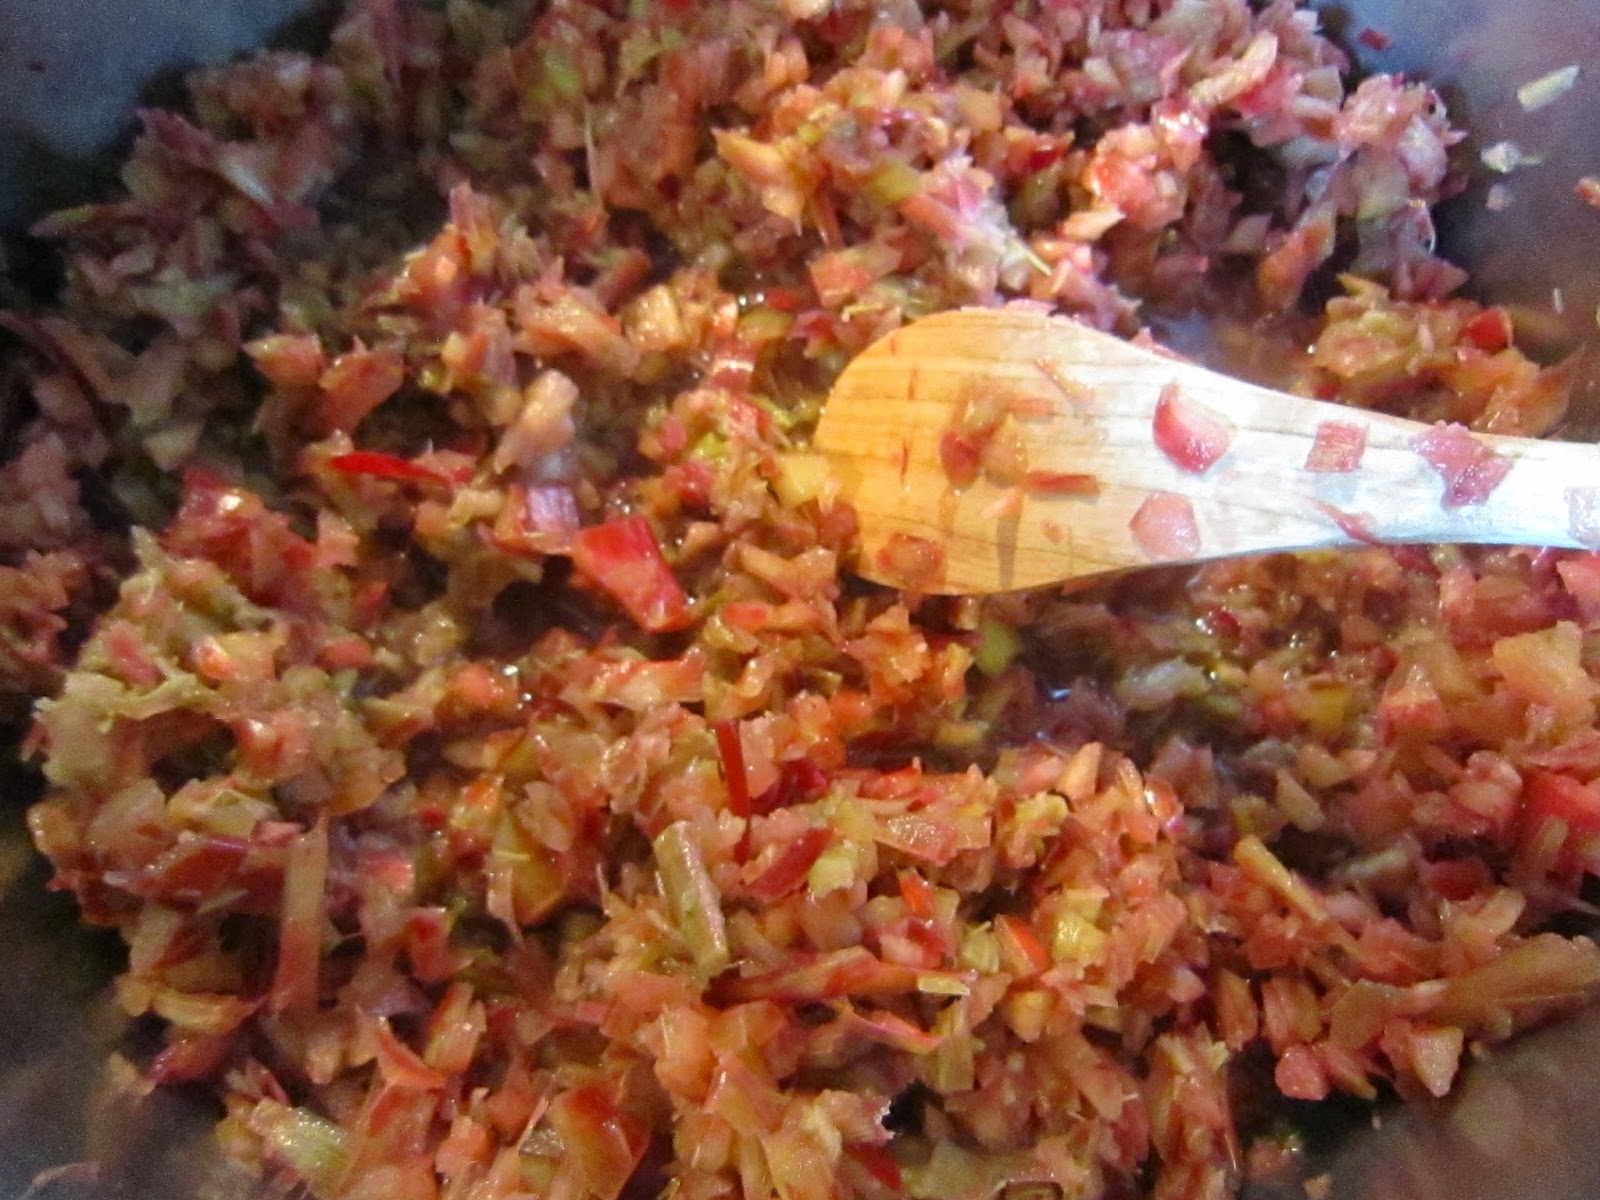
Step 6: Measure out exactly 4-1/2 cups of processed rhubarb, put it in a pot, add the Sure-Jell, and the butter and bring it to a boil stirring constantly!

Step 7: I'm sure after reading the recipe you pre-measured the sugar right?  I did!!!  And once the pectin part is boiling, dump in the sugar!  And bring it back to a boil, and the let it boil for exactly 1 minute!

Step 8: This is a big step, this is the canning step, so there are smaller steps within this step...get a plate to set the jars on, a good funnel, pour hot jam into a sterilized jar until it is 1/4" below the rim, carefully wipe the rim and the rings to make sure there is no jam, place a sterilized lid and ring on the jar, finger tight, place to the side and repeat until you have enough to fill the canner, or in our case a very large stock pot. Bring the water to a low boil and place the jars in the water, leave in for 10 minutes.

Step 9: Very carefully take the jars out of the water after 10 minutes and put on a towel, you will want to listen for the pop....watch my video...

Step 10: Let the jam sit out, undisturbed for 24 hours...then you can put it away, it is shelf stable at this point and does not need refrigeration.

Step 11: Clean up...my LEAST favorite part of the whole process...
At least I have some tasty jam to share and enjoy!

Monday, July 14, 2014

Another creative outlet!

Twenty-something years ago I was introduced to the art of stained glass making.  My first piece was an iris that I made for my mom.  She still has it, and it still hangs in her house.

Weeks ago I found out about a "glass camp" that was being held, for two weeks, so I said why not!  I didn't realize at the time that it was a stained glass camp and imagine my joy when I found that there is a local studio that teaches this wonderful art!!! During the first class we were given clear glass to practice cutting techniques on, then we could choose from three small and easy projects before being "cleared" to start on something else.  So I chose the frog, and got him completed in the first day!!  All of the techniques came back to me so quickly!

When I got home from the first class I popped onto Pinterest to research more projects to do, small ones of course. Some day, I will tackle some larger projects, and have already had an offer to commission three pieces for a house!  And of course I want to do some window panels for my own house.  For now I'm going to focus on some smaller sun-catcher projects that I can use as gifts, the first is being made for my husband!

With any project, it is easiest to number your pattern directly on the paper so you have a reference.  You will also mark the pieces with the same number so you can keep track of everything.

The cutting process requires a lot of patience, a LOT, because I broke more pieces to begin with than I kept....

I finally figured out what my "problem" was, I was afraid of getting cut, glass is very sharp (duh!) so I put gloves on and was able to keep my pieces from breaking in the wrong place! After the pieces are cut I placed the pieces on the pattern and taped them together, it's always a good idea to do this because it makes storing them between classes so much easier!

Of course I did the heart shape last, not recommended, but it worked out.

I just had to do a LOT of grinding.


Doing glass art is a lot about compromises.  I am relatively new to this art, I know my final project will NOT match my pattern, and I just have to be OK with that, as long as the final project looks good!

All fitted                                            Cleaned and together                                  Starting the foil process
Adding the copper foil was the "easy" part, but it was also the part where I cut myself...of course!
After the taping is done it's time to get the pieces back together, add the flux and solder the pieces together, starting with tacking the corners.


After everything is in the correct spot and you are happy with your piece it is time to finish soldering the piece!

Once the first side is done allow it to cool then flip it over to do the second side.

I decided that I wanted to make the piece stronger so I stretched some lead rail and pieced that over the outside, I did end up removing a lot of the copper foil from the outside edges.
My instructor showing me how to
use the lead rail

Then you add any details that you want to finish the piece, by tinning copper wire then soldering it in place.

Friday, July 11, 2014

Rhubarb Pie

Way back in the day, when we lived in Bolivar, Mo, my Grandpa's neighbor used to grow rhubarb, and would give it by the bag to my mom.  She would make Jam, and pie all summer long, and share it with him, my Grandpa and others.  It has been years since I had my mom's rhubarb pie.  Suddenly I have been CRAVING my mom's rhubarb pie...only I didn't have anywhere to get the rhubarb!  I eventually found someone who had it, in abundance and they gave me enough to make a rhubarb pie!!! And almost enough to make a batch of jam too!!!  But for now we made the pie.

Start by making the crust (thank you Mama, cause I'm still not the best at making these)

Then clean the rhubarb

and chop it up!  You are going to need 4 cups (or just a bit more)

Add the few ingredients (1/4 c flour, 1 cup sugar and 1/2 tsp orange zest)

Stir it up!

Dump it into the pie shell...

Dot with butter (use 2 Tbls)...

Put the top shell on and slit...

Then bake that pie for 10 minutes at 450 degrees, then lower the temperature to 350 and continue baking another 30 minutes!  After the pie is cool, refrigerate it until you are ready to slice and eat it!
Enjoy!
I know that next year I will be starting my rhubarb growing experience.  Because now that I have indulged, I will want more and more of this yummy plant!