Wednesday, November 23, 2011

Ms. Fish's Devilish Eggs

Everyone has a deviled egg recipe, this is mine.

I usually make a dozen eggs when I make Devilish Eggs.  They go quickly and have a nice bite. All measurements are approximate.

2 tsp granulated sugar
2 tsp mayo
2 caps full apple cider vinegar (get the small bottle)
2-3 tsp honey Dijon mustard

Mash up all egg yolks then add sugar and mix till combined.  Add remaining and mix till smooth.
Fill egg whites.  To finish sprinkle with HOT smoked Paprika.  This is the key to being Devilish instead of just being deviled.

It's all about the Bacon

For a meat eater, you know that any recipe that starts with Bacon is going to be good.  Many of my friends think I have a problem with bacon.  This is simply untrue!  I love Bacon, it is the candy of meats and has been proven to go with sweet and savory dishes.  Maybe this is why they think I have a problem...I also have a "small" obsession with spices, I have a whole cabinet and a half of spices, and my prize spices are in little glass jars that sit in a line above my range.


Anyway tonight while prepping all of the wonderful side dishes I am in charge of tomorrow I realize that at some point I DO need to eat.  There are a few things I consider "staples" in my fridge/cabinets: Bacon, butter, onion, shrimp (this is in the freezer of course) and mushrooms. Tonight I am out of mushrooms (sad face). But I do have leftover red onion from my salad prep so my plan is pan seared bacon shrimp.  I'm not the best at estimating amounts, I usually just add to taste.  I did use two slices of bacon chopped, and added that to the onion in a pan, and a small pat of butter.  Once that was almost done I added minced garlic.  The shrimp goes on top of that for 2 minutes then flip each shrimp.  The spices I  used were Extra Bold Smoked Sea Salt, Cajun seasoning and Blackened Seasoning.  Cook 3-4 more minutes until shrimp is pink all the way through!

Copycat recipe: Lambert's "Throwed" Rolls

For Turkey day I was asked to prepare a leafy salad, and some rolls.  Just so happened I found the copycat recipe for Lambert’s “Throwed” Rolls.  I have never made rolls or bread by myself before.  I’ve always had my mom right there with me making sure I didn’t mess it up…well this year mom is not here so this is my first solo attempt at making something edible.

First step is to assemble the ingredients, no matter what I’m making I always gather everything in the recipe so I don’t forget something.  Yes I’ve done that before with almost disastrous results that I ate anyway.  At this point I would also remove all jewelry that will get in the way when kneading, and just leave it OFF until you are done messing with the dough, my finger got swollen after the first off and on, so I had to hold it under cold water to get it off again later...


Once the yeast was going, one of my favorite smells ever, I started mixing the milk, butter, sugar and egg using my regular beater.  After that time seemed to fly and before I knew it the timer was going off saying the yeast was ready.  I switched to the dough hook; I’m sure I could have used the dough hook the whole time but I wasn’t sure and erred on the side of caution, and extra dishes.  It took a bit more than the 3 1/2 cups to form what I thought was the correct consistency and then I dumped it out on the flowered board as suggested.  After trying to knead on that board I quickly dumped the whole mess on the counter and finished it there.


I did wash dry and start to butter my mixing bowl before I decided to use a different metal bowl instead, so that got buttered and then it was time for the kneading.  Four minutes went by quickly and I got a great arm workout!  And then it’s the waiting game, the directions don’t quite say how LONG it takes for the dough to double, so I called my mom.  Anywhere from 30 minutes to an hour…


…an hour later it’s time to butter the muffin tins, punch down the dough and get it formed!  I need to practice with this, nothing is the same size, but then it's the taste that matters right?  And now to wait another 45 minutes…


…time to heat the oven and get these bad boys baking!


And the finished product!!  Even though the recipe didn't say to, I smothered them in butter when they came out of the oven!


Lambert's Cafe Throwed Rolls
1 teaspoon granulated sugar
1 package dry active yeast
1/4 cup tepid water ( 105 to 110 degrees F)
1 cup warm milk
1/4 cup melted butter
1/4 cup granulated sugar
1 egg beaten ( at room temperature)
1 teaspoon salt
4 cups all-purpose flour, divided

Combine the 1 teaspoon of sugar and yeast in tepid water. Let stand 5 to 10 minutes until yeast begins to foam. Thoroughly mix milk, butter, sugar, egg and salt in large bowl.

Stir in the yeast mixture and 3 1/2 cups of the flour, adding a bit more if necessary to make a soft pliable dough. Turn dough out on floured board and let rest while you clean and butter bowl. Knead dough gently, 4 to 5 minutes, adding flour if necessary, until dough is smooth and silky.

Return to bowl, cover with plastic wrap and let rise in warm place until doubled in size.

Butter a 12 cup muffin tin. Punch down dough. Pinch off pieces about 1 1/2 inches in diameter (enough to fill 1/2 of muffin cup), and roll into smooth spheres. Place two such pieces in each prepared muffin cup. (It should be a tight fit). Cover dough loosely with plastic wrap for 45 minutes.

Heat oven to 350 degrees F. Bake rolls 20 to 25 minutes or until light brown. Serve as soon as they are cool enough to throw.

Makes 12 rolls.

Tuesday, November 22, 2011

Hot Salted Caramel White Russian


I live in Missouri, and tonight like most nights this time of year is quite chilly.  I ran out of dark chocolate squares last week so I was considering all of my options for a warm adult beverage and came up with the idea to make a steamer of sorts.  You remember the steamed flavored milk that you can get from QT, but nothing powdered in my kitchen!


To start I added some whipping cream (yeah) and some milk, and some White Chocolate Caramel creamer and set it on medium heat so it wouldn't scald.  In my mug I put Vanilla Espresso Vodka, and Vanilla Kahlua.  When the milk combo started to heat up I tossed in a dash of white Mexican vanilla and some vanilla sea salt.  I stuck my immersion blender into the pot on low and let it foam until the perfect temperature.  To finish simply pour over the alcohol in the mug and stir slightly!  Make sure the milk isn't overly hot, you don't want to cook out the alcohol.

Welcome one and all

So tonight I started thinking about all of the comments from my friends about me starting a blog about my adventures with food, especially those that include bacon.  I think they are right and starting tonight I will start to photograph and blog about my exploits and knowledge from the kitchen.

Please sit back from the keyboard (so you don't drool on it) and enjoy my blog!

Tuesday, May 24, 2011

Kitchen Re-doux

The last major project in our house is nearing completion.  We decided to remodel the kitchen, and tonight I was able to start loading the cabinets! Why are you just now hearing about it?  Good question, but lets get caught up with the project to date!

Demolition was planned for April 23rd. Yup Easter weekend, and right before my last regular week of classes before a week of finals.  My parents came up on the 22nd to help me pack up everything in the kitchen to prep for the fun part.  It took almost all day, and a few bumps and bruises (one that I still have a month later, yeah ouch) but we finally got everything taken out, and cleaned up!
Photo
My favorite part of the demo was finding out that the insulation in the walls was Gustin Bacon...yup, only the bacon queen would have bacon insulation, this means that I win the bacon contest forever!  LOL

Photo
All of the old paneling had to go, so to save time we just removed all of it and started from scratch, and added a half wall...

Photo 
After that things moved along nicely!  We only had a week to do the 24 hour thing, so we are now just doing it a little bit at a time.  I helped stain the cabinets, and used that wonderful dark brown Jacobean I had used last semester on the bench project...Looks great!
Photo
Finally it was time to get all the drywall up, taped and mud-ed, then to re-spray knockdown on the ceiling (thanks Adam!)
Photo
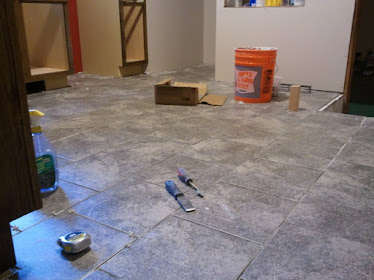
After the walls were painted, and cabinets installed (sans doors) we were finally able to lay the tile floor, and grout!  I love the way it turned out, not bad for re-sale tile!
Photo
So now here we are one month later, most of the doors are on the cabinets (a few need to be re-drilled to open the other direction), the appliances are in place (all the plumbing needs to be done still so no dishwasher or sink), counter tops are installed...this week we are working on the trim for the windows then we can tile the back-splash!  Course the East wall still needs custom cabinets, but we are going to build those ourselves after we get the kitchen functioning!
Photo
Almost forgot the vent hood for over my stove!  We purchased it at a resale store, got a great deal on it, but we have to keep calling to get more parts for it because it had been altered, or was missing a few things!  Luckily for us the replacement parts aren't costing us a thing, just time!

I was excited to be able to cook a meal in the kitchen the other day, nothing special, just bacon and eggs for breakfast!  But it is really nice to be able to cook again!  And soon I will be able to do my dishes in the dishwasher instead of the bathtub!

Till next time...
Onward

Sunday, February 20, 2011

Competitions

My second place design.  A little bummed that I didn't win, but then again I was up against Senior Graphic Design Majors so that's pretty "shweet."

The other competition is just within my class and my design looks like this:

I'll let everyone know when we find out who is the winner and stuff...